
TL;DR
A closet studio can drastically reduce echo and noise if you seal gaps, treat reflection points, and ensure proper ventilation. Placement near the mic and smart use of materials matter more than big investments in foam or bass traps.
Imagine turning a tiny closet into your go-to vocal booth or recording nook. The secret isn’t just slapping foam panels everywhere—it’s about smart placement, sealing gaps, and managing heat.
This guide will show you how to get the best sound quality by focusing on what really moves the needle: controlling reflections, blocking sound leaks, and making sure your rig doesn’t turn your closet into a sauna.
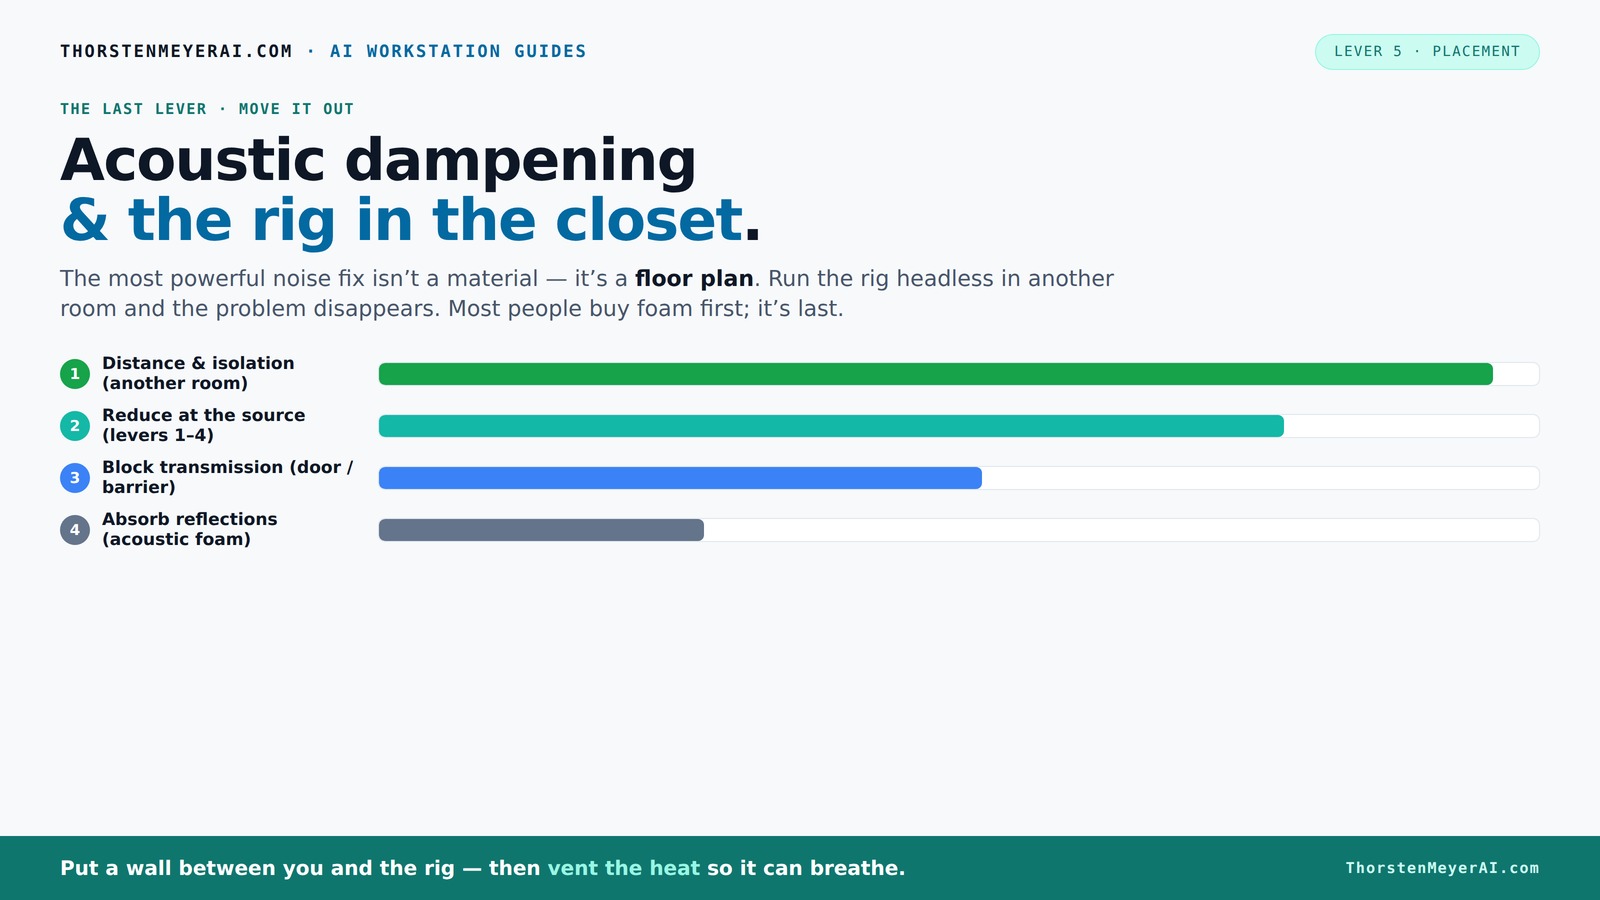
Acoustic dampening
& the rig in the closet.
The most powerful noise fix isn’t a material — it’s a floor plan. A rig you can’t hear because it’s in another room beats any amount of foam. Tap the approaches in Part 1 to see what actually works.
(another room)
(levers 1–4)
(door / barrier)
(acoustic foam)
Contain the noise, not the heat
Key Takeaways
- Sealing gaps and door edges is the first step toward quieter closet recordings.
- Treat reflection points around the mic—mainly the wall behind and ceiling—to reduce echo and boxiness.
- Use bass traps only if you hear low-end boominess—corner placement helps tame low frequencies.
- Place the rig in a well-ventilated, ventilated space—heat buildup will ruin your gear faster than any echo.
- Budget DIY materials like blankets and rugs can be surprisingly effective if placed correctly.
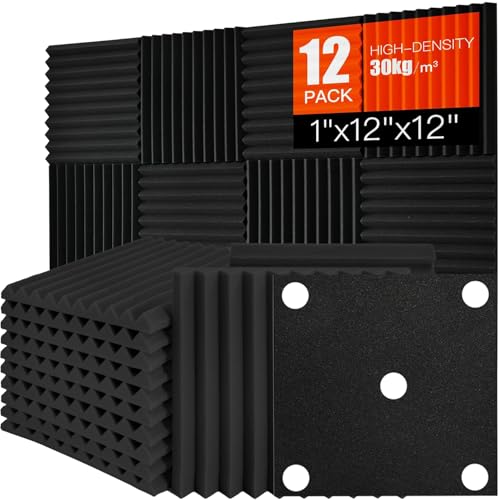
Saiqiang Acoustic Foam Panels Sound Absorbing 12 Pack - 1" X 12"X 12" Sound Proof Panels Noise Reducing for Walls, High Density Sound Deadening Panels Black Wedge for Studio Recording & Office & Home
Professional Sound Absorption for Studios and Podcast Spaces - High-density acoustic foam panels and sound absorbing panels are...
As an affiliate, we earn on qualifying purchases.
As an affiliate, we earn on qualifying purchases.
Why Acoustic Treatment Isn’t Just About Foam Panels
Most people think thick foam or bass traps are the magic fix. But in a tiny closet, the real challenge is echo and reflections. Foam absorbs echoes, making your voice clearer, but it won’t stop sound from escaping. That’s where sealing gaps and strategic placement come in.
For example, sealing the door edges with weatherstripping can cut noise leakage by over 20 dB. This reduction is crucial because even a small gap can let in or leak out a significant amount of sound, undermining your treatment efforts. Combining that with treating the wall behind your mic minimizes reflections and makes your recordings cleaner. Skipping this foundational step means you’re fighting an uphill battle—foam alone won’t contain sound or prevent leaks, and your recordings will still pick up unwanted noise or room echo. Proper sealing and placement create a more controlled acoustic environment, which is the foundation for any effective treatment.

ATS Acoustics Home Office Residential Acoustic Treatment Room Kit Sound Absorbing Acoustic Panel 8 Pack for 120-200 Sq Ft (Platinum)
8 Piece Kit contains 6 wall panels and 2 ceiling panels, each panel is sized 24" x 48"...
As an affiliate, we earn on qualifying purchases.
As an affiliate, we earn on qualifying purchases.
How to Properly Place Acoustic Panels in a Tiny Closet
Start with the main reflection points—usually the wall behind your mic and the ceiling directly above it. You can learn more about acoustic treatment here. Placing panels on these surfaces reduces flutter echo and prevents the sound waves from bouncing around chaotically, which can make recordings sound dull or boxy. But understanding why these points matter is key: reflections from these surfaces directly impact the clarity and warmth of your recordings.
Here’s a simple step-by-step:
- Identify your mic and speaker positions. Use a mirror or listen carefully to determine where sound reflects directly back to the mic.
- Mark the wall opposite the mic—the primary reflection point—by holding a mirror and checking where reflections bounce back to your listening position.
- Attach a panel there. Repeat for side walls if space allows. Remember, the goal is to intercept sound waves before they bounce into your mic capsule.
- Don’t forget the ceiling—especially if sound bounces down onto your mic. Treating the ceiling can dramatically reduce room tone and reverb.
Using a mirror trick helps: hold a mirror along the wall while speaking into the mic. Wherever you see your reflection, that’s where sound bounces back to the mic, requiring treatment. Proper placement ensures you’re addressing the most critical reflection points, which directly improves clarity and reduces unwanted room sound.

SQKM Weather Stripping Door Seal Strip, D-Shaped Self-Adhesive, Soundproof Blocks Cold Drafts & Dust, Black TPE 20Ft (3/8" W × 1/4" T) for Door Frames & Windows
【THICKENED TPE SEAL & SAVE】Crafted from premium thickened TPE, this D-Shaped Weather Stripping boasts strong sealing and anti-deformation...
As an affiliate, we earn on qualifying purchases.
As an affiliate, we earn on qualifying purchases.
Blocking Sound Leaks Through Gaps & Doors
Sound leaks through cracks, door edges, and ventilation gaps can undermine your entire acoustic setup. For tips on sealing your space, see this guide. Even tiny gaps act as sounding boards, allowing noise to escape or enter, which can ruin recordings or disturb others. Sealing these gaps isn’t just about quieting your space—it’s about creating a controlled environment where your microphone captures only your voice, not ambient noise.
Weatherstripping around the door frame and sealing cracks with acoustic sealant can reduce noise escape by as much as 30 dB. This is a significant reduction, especially in small spaces where every decibel counts. For the door itself, hanging a heavy blanket or installing a dedicated door seal kit makes a noticeable difference—these barriers absorb and block sound transmission effectively. Even a few inches of dense moving blankets can cut noise transmission significantly, but be aware that adding mass alone isn’t enough; sealing is essential.
And don’t forget ventilation—install a duct with a muffler or a quiet fan to vent heat without letting sound escape. Properly designed ventilation ensures your gear stays cool without compromising sound isolation. Combining sealing with strategic soundproofing and ventilation creates a safe, quiet, and comfortable environment for your recordings.

VEVOR Portable Vocal Booth, 6.56 ft Height, Portable Recording Studio with Travel Bag, Mobile Tablet Stand, Thickened Soundproofing, Sound Isolation Booth for Echo-Free Vocals, Podcasts, Voiceovers
Say Goodbye to Echoes: Built with durable Oxford cloth and acoustic padding, this recording booth for the home...
As an affiliate, we earn on qualifying purchases.
As an affiliate, we earn on qualifying purchases.
When and Why to Use Bass Traps in a Closet
Bass buildup happens when low frequencies bounce around a tiny space, creating boominess and muddiness that can muddy your recordings. You might find useful strategies at this site. In a closet, this is common if walls are parallel and untreated, resulting in standing waves that amplify certain frequencies and diminish others. Recognizing when bass trapping is needed is essential because it directly impacts the clarity of your low end.
Use bass traps if you notice your recordings sound muddy, boomy, or if you hear a 'thump' or 'rumble' that doesn’t match your source. These are signs of low-frequency resonance issues. Placing bass traps in the corners is most effective because they intercept the standing waves where they tend to form—at the junctions of walls and ceiling or floor. But be cautious: over-treating can deaden the room excessively, making it sound unnatural. In small spaces, broad wall and ceiling treatment often provide more balanced absorption without overdoing it. The tradeoff is between controlling low-end problems and maintaining a natural, lively sound—judicious placement of bass traps is key.
Best Mic Placement for a Closet Vocal Booth
The mic position can make or break your sound. Keep the mic about 6-12 inches from your mouth, aiming slightly downward to avoid plosives and sibilance. For more microphone placement tips, visit Wihok. Placing the mic too close can cause proximity effect, which boosts bass frequencies, making your voice sound boomy; too far away, and you pick up more room noise and reflections. Avoid placing it directly against a wall or reflective surface because this can cause comb filtering—phase cancellations that color your sound.
For best results, set up the mic so that it’s not pointing directly at hard surfaces—use a small foam shield or a folded towel behind the mic if needed. Angling the mic slightly off-axis can help reduce problematic reflections bouncing directly into the capsule, especially in tight, reflective spaces. Experimentation is key: small adjustments in distance and angle can significantly improve clarity and reduce unwanted room sound, making your recordings crisper and more professional.
DIY Materials That Make a Difference Without Breaking the Bank
You don’t need to buy expensive foam panels. Instead, consider DIY solutions like blankets and rugs, which can be surprisingly effective. Learn more at Ittiri. Heavy moving blankets, thick curtains, and even old quilts can absorb sound effectively when placed correctly. These materials are often overlooked but can dramatically improve your acoustic environment without a big investment. When hung at reflection points or over hard surfaces, they dampen echoes and reduce reverb, making your recordings clearer.
Use command strips to hang blankets in reflection points, or layer multiple blankets for more absorption. Rugs on the floor cut down on reflections bouncing from hard surfaces and help anchor your space acoustically. Combining these DIY materials with sealing gaps and treating the primary reflection points maximizes your budget and effectiveness. Remember, placement is everything: strategically positioning these materials around your setup ensures you’re tackling the most problematic reflections and resonances.
Temporary vs. Permanent: Making Your Closet Rig Renter-Friendly
If you rent, permanent modifications are tricky and often not allowed. The key is to focus on removable solutions that don’t damage walls or doors. Use freestanding panels or tension rods with fabric that can be easily moved or taken down without leaving marks. Heavy blankets or quilts draped over furniture or stands can be effective and portable. These options allow you to create a semi-treated environment that’s adaptable to your space and lease agreements.
For heat management, portable fans or small venting ducts can be added without invasive work, helping to keep the space cool and prevent overheating of your gear. The goal is to balance acoustic improvements with respecting your rental terms—using lightweight, non-permanent solutions that can be stored away when needed.
How to Prevent Your Closet Rig From Turning Into an Overheated Sauna
Vented setups are essential when placing a high-power rig in a closet. Without proper ventilation, heat can quickly accumulate, damaging your equipment and creating an uncomfortable environment. Use an exhaust fan or duct system to carry heat outside—this actively removes hot air and replaces it with cooler air, maintaining a safe temperature. Passive vents alone might work for low-power setups, but active cooling ensures your hardware stays within safe operating temperatures and prevents thermal throttling that can degrade performance.
Proper ventilation also reduces humidity and prevents mold or mildew, which can damage gear and affect air quality. For more detailed cooling strategies, check out the guide on reducing heat and noise in AI workstations. Investing in a good ventilation system is a crucial step to keep your closet studio safe and functional over time.
Frequently Asked Questions
What’s the biggest mistake people make when soundproofing a small closet?
Most forget to seal gaps and treat reflection points first. Without sealing cracks and addressing echoes, additional panels won’t make much difference.Do I need bass traps in a tiny closet?
Only if you notice low-end boominess or standing waves. Typically, corner bass traps help tame those issues, but broad wall treatment often helps more overall.Can foam panels really do enough in a closet studio?
Foam panels are great for reducing echo and flutter echo, but they won’t block sound from escaping. Seal gaps and treat reflection points before relying solely on foam.How do I keep my rig cool in a small, sealed closet?
Use active ventilation with exhaust fans or ducted airflow. Proper cooling prevents heat buildup that can damage hardware and cause noisy throttling.Is it possible to make a closet studio renter-friendly?
Absolutely. Use portable, removable solutions like blankets, tension rods, and lightweight panels. Focus on sealing leaks and ensuring good airflow to keep it simple and effective.Conclusion
Turning a closet into a functional studio isn’t about pouring money into foam. It’s about sealing leaks, smart placement, and proper ventilation. Think of your closet as a tiny control room—where every gap closed and every surface treated brings you closer to professional sound.
Remember, a well-placed mic, a sealed door, and a fan are your best allies. Your closet can become a quiet, efficient zone for voice, voiceover, and even some instrument work—without sacrificing heat or breaking the bank. Now go make that space work for you.