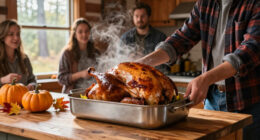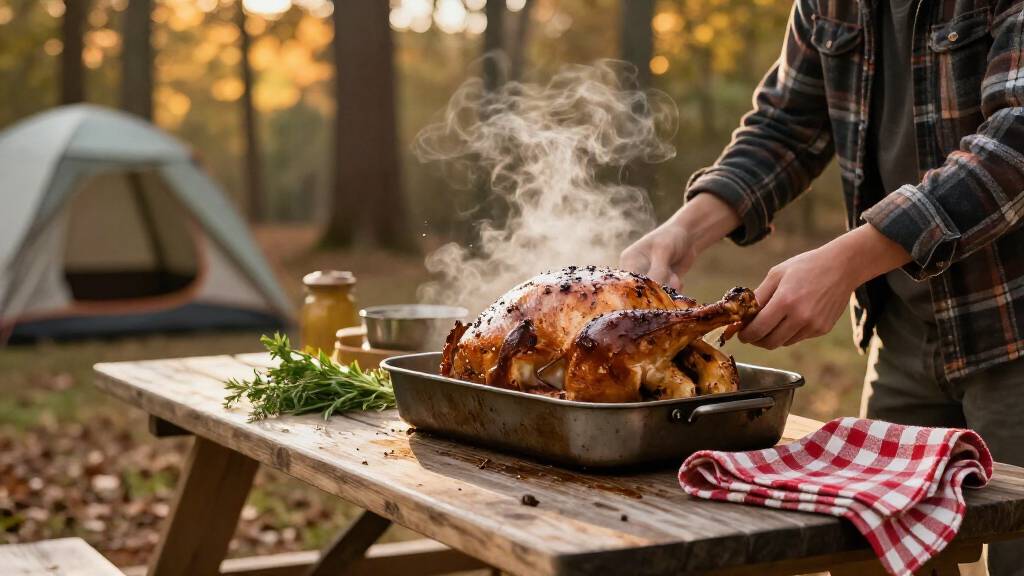

Choose a Thanksgiving roasting pan that fits your turkey, oven, and cooking method, then prepare it for roasting. This guide is for home cooks who need practical help selecting a pan, positioning the bird, and avoiding spills or uneven cooking. Allow 30-60 minutes to compare pans and prepare your setup; cooking time depends on the turkey and recipe. Use a food thermometer to check doneness rather than relying on time or appearance alone.

Get travel and outdoor gear delivered free with Prime
- Fast, free delivery on millions of items
- Prime Video, Amazon Music and more included
- Member-only deals all year

MICHELANGELO Hybrid Nonstick Roasting Pan with Rack, 17 x 14 Inch
- ✔ Material: Tri-ply stainless steel
- ✔ Coating: Ceramic nonstick; described as PFAS-, PTFE-, and PFOA-free
- ✔ Interior dimensions: 16.9 × 14.2 × 3 inches

Caraway Ceramic Nonstick Roasting Pan with Stainless Steel Rack, 16 x 13 in
- ✔ Pan dimensions: 16 × 13 × 3 inches
- ✔ Materials: Ceramic and stainless steel
- ✔ Finish: Ceramic nonstick

17 × 13-Inch Nonstick Turkey Roasting Pan with U-Shaped Rack
- ✔ Material: Carbon steel
- ✔ Finish: Nonstick
- ✔ Title dimensions: 17 × 13 inches
Difficulty: Beginner | Time: 30-60 minutes to choose and prepare; roasting time varies by turkey size
What You’ll Need
Tools & Materials:
- Measuring tape or ruler
- Oven-safe roasting pan with sturdy handles
- Roasting rack, if the pan does not include one
- Instant-read or leave-in food thermometer
- Oven mitts
- Rimmed baking sheet or sturdy tray for carrying the pan
Knowledge:
- How to measure your oven interior and turkey
- How to follow a turkey recipe and thermometer instructions
Check the oven manual and pan manufacturer’s temperature and cooktop limits. Pan materials differ: some are safe for stovetop gravy-making, while others are oven-only. Keep the turkey refrigerated until preparation and follow food-safety guidance for thawing and handling raw poultry.
MICHELANGELO Hybrid Nonstick Roasting Pan with Rack, 17 x 14 Inch
For a Thanksgiving centerpiece where oven range and a sturdy-feeling build matter, the MICHELANGELO Hybrid makes the strongest all-around case in this group. Its tri-ply stainless steel construction is described as helping distribute heat evenly, and its stated 600°F oven limit is higher than Caraway’s 550°F and the carbon steel pan’s 450°F. That extra headroom is useful for recipes that call for hotter roasting or finishing, though we should still follow the recipe and product care guidance.The removable rack raises the roast about an inch above the drippings, supporting airflow and browning. We can also remove it when using the pan for other dishes, a flexibility the supplied descriptions do not emphasize for the other racks. Compared with Caraway’s 16 × 13-inch pan, this model has a larger overall footprint; compared with the carbon steel option, its listed dimensions are more detailed but include handles and total height that need to fit the oven.The tradeoff is practical: the 20.3 × 15-inch overall size can be awkward in a compact oven or cabinet, and the rack brings the total height to 5.5 inches. Its capacity is still about 22 pounds, so the larger exterior does not establish that it accommodates a bigger turkey than the other two. Choose it for construction and heat range, not extra bird capacity.
Pros:
- Tri-ply stainless steel construction is described as helping distribute heat evenly.
- Oven safe to a stated 600°F, the highest limit among these three pans.
- Removable rack raises the roast above drippings and lets the pan serve other uses.
- Compatible with induction, gas, and electric cooktops.
Cons:
- Overall dimensions of 20.3 × 15 inches may be difficult to fit or store.
- The rack raises total height to 5.5 inches, so vertical oven clearance matters.
- Capacity is described as about 22 pounds, matching rather than exceeding the other options.
Best for: Thanksgiving cooks who want a tri-ply stainless steel pan, a removable rack, and a high stated oven temperature limit.
Not ideal for: Buyers with a compact oven or limited storage, or anyone seeking capacity beyond a roughly 22-pound turkey.
Bottom line: We rank it first for its combination of tri-ply construction, removable rack, and 600°F oven limit, provided its full size fits our kitchen.
“We rank it first for its combination of tri-ply construction, removable rack, and 600°F oven limit, provided its full size fits our kitchen.”
Caraway Ceramic Nonstick Roasting Pan with Stainless Steel Rack, 16 x 13 in
Caraway is the most straightforward choice here when we want a roasting pan that can move from oven to cooktop. It is explicitly listed as compatible with induction and other stovetops, a useful distinction for cooks who want to build gravy or reduce drippings in the same vessel. The MICHELANGELO Hybrid also lists cooktop compatibility, but Caraway’s description calls out all stovetops, including induction, alongside a stainless steel wire rack.Its 16 × 13 × 3-inch pan is the smallest of the clearly stated footprints, while the supplied description gives an oven limit of 550°F. That sits between the carbon steel model’s 450°F and MICHELANGELO’s 600°F. However, Caraway recommends low to medium heat and a small amount of oil or butter. That guidance shapes how we should use the ceramic nonstick surface, especially when comparing it with the higher-limit hybrid pan.There is an information wrinkle: the product description also includes mismatched instructions about a double burner griddle. We should not rely on those unrelated directions when evaluating this roasting pan. For Thanksgiving, its strongest role is the induction-friendly oven-to-stovetop option; skip it if we expect to use high stovetop heat or want the largest pan in the group.
Pros:
- Compatible with induction and other stovetops.
- Includes a stainless steel wire rack for roasting, basting, and browning.
- Stated oven limit of 550°F exceeds the carbon steel pan’s 450°F limit.
- Ceramic nonstick coating is described as free of PFOA, PTFE, lead, and cadmium.
Cons:
- Recommended for low to medium heat, which limits the guidance for high-heat cooking.
- Description includes mismatched double-burner griddle instructions.
- At 16 × 13 inches, it is smaller than the MICHELANGELO pan’s listed overall footprint.
Best for: Cooks with induction or another compatible cooktop who want to use the roasting pan for drippings and gravy after the turkey comes out.
Not ideal for: Buyers who need high-heat stovetop searing guidance, a larger footprint, or product instructions without conflicting details.
Bottom line: We would choose Caraway when induction compatibility and stovetop gravy matter more than maximum oven heat or the largest footprint.
“We would choose Caraway when induction compatibility and stovetop gravy matter more than maximum oven heat or the largest footprint.”
17 × 13-Inch Nonstick Turkey Roasting Pan with U-Shaped Rack
This carbon steel pan is the most direct choice for shoppers who want a nonstick roasting surface and an included U-shaped rack without prioritizing a premium stainless steel build. The rack lifts food above grease and juices, and the angled handles are described as preserving cooking area while making oven maneuvering easier. For a traditional Thanksgiving turkey, those are practical features; the stated capacity is up to 22 pounds, the same approximate ceiling given for the MICHELANGELO pan.Its main advantage over Caraway is a higher stated limit than a typical midrange roast may need? The supplied figures are clear: the carbon steel pan is oven rated to 450°F, below Caraway at 550°F and MICHELANGELO at 600°F. Its simpler pitch is easy release and cleanup, not cooktop versatility: no cooktop compatibility is supplied. We should therefore treat it as an oven-focused option and avoid assuming it can be used on a burner.Fit is the bigger concern. The title says 17 × 13 inches, but the listed item dimensions are 15 × 8 × 3 inches. That conflict makes it difficult to know whether it will suit our oven, turkey, and storage space. Compared with Caraway and MICHELANGELO, this ambiguity weakens the buying case even though the U-shaped rack and angled handles are appealing. Verify the actual dimensions with the seller before relying on it for the holiday meal.
Pros:
- Nonstick finish is designed for easier food release and cleanup.
- U-shaped rack elevates food above drippings.
- Angled handles are intended to ease handling and preserve cooking area.
- Described for turkeys up to 22 pounds.
Cons:
- Title dimensions of 17 × 13 inches conflict with listed dimensions of 15 × 8 × 3 inches.
- 450°F oven limit is lower than both other options.
- No cooktop compatibility information is provided.
Best for: Cooks who want an oven-focused carbon steel pan with a nonstick coating, a U-shaped rack, and angled handles.
Not ideal for: Anyone who needs verified dimensions before buying, wants a higher oven limit, or plans to use the pan on a cooktop.
Bottom line: We would consider this pan for a straightforward nonstick roast, but only after confirming its true dimensions and accepting its lower oven limit.
“We would consider this pan for a straightforward nonstick roast, but only after confirming its true dimensions and accepting its lower oven limit.”
As an Amazon Associate we earn from qualifying purchases.
Before You Start
Measure the oven rack opening and interior width, depth, and height, including room for the oven door to close. Account for handles and the turkey’s height. A pan that technically fits may still be difficult to lift or may block airflow. Plan a clear, heat-safe landing place before the pan goes into the oven. Never place a hot pan on a cold, wet, or delicate surface.
Choose a pan with raised sides to contain juices, but avoid sides so tall they prevent heat from reaching the turkey evenly. If you are roasting a large bird, recruit another adult to help move the hot pan.
Step-by-Step Instructions
Step 1: Measure the turkey and oven
Check the turkey’s weight and measure its approximate length and height, including any parts that project upward. Measure the oven interior and the available rack space. Leave room around the pan for air circulation and enough clearance to slide the rack in and out.
Tip: Measure the oven with the rack at the level you plan to use. Handles count toward the pan’s total width.
Check: You have the turkey dimensions and know the maximum pan size that can sit level and allow the oven door to close.
Step 2: Select a pan with enough capacity
Choose a sturdy, oven-safe pan large enough to hold the turkey without touching the sides. A shallow roasting pan often promotes browning; sides roughly 2 to 3 inches high contain drippings while leaving the bird exposed to oven heat. Select a heavier pan with secure handles if you expect to lift it while full.
For a small turkey, a compact pan may work. For a large bird, use a pan and rack rated for its weight. Do not use a disposable foil pan by itself for a heavy turkey unless it is supported by a rigid baking sheet or roasting pan.
Tip: Stainless steel and aluminum pans are common choices. Check the maker’s instructions before using a pan on a stovetop or under a broiler.
Check: The turkey fits with a little room around it, the pan sits flat, and the handles are secure and reachable with oven mitts.
Step 3: Check the rack and pan compatibility
Set a roasting rack inside the pan if one is not built in. Confirm the rack fits without rocking and raises the turkey above the bottom so hot air can circulate and drippings can collect. If using vegetables as a natural bed, arrange them in a stable layer that supports the turkey.
Place the empty pan on the oven rack and slide it partway in, then out, to confirm clearance before adding food.
Tip: A rack is useful but not mandatory. Keep the turkey stable and avoid stacking vegetables so high that the bird sits near the pan rim.
Check: The empty pan slides in and out smoothly, and the rack or vegetable bed supports the bird without wobbling.
Step 4: Prepare the turkey and roasting pan
Follow your recipe to thaw and season the turkey. Remove the neck and giblets if the recipe calls for it, then pat the skin dry with paper towels. Wash hands and sanitize surfaces after handling raw poultry. Lightly oil the rack or pan only if the recipe recommends it, and add aromatics or a small amount of liquid only as directed.
Tip: Do not rinse raw turkey in the sink; splashing can spread germs. Keep raw poultry separate from ready-to-eat foods.
Check: The turkey is ready according to the recipe, the pan is clean and dry, and no loose packaging or giblets remain inside the bird.
Step 5: Position the turkey and load the oven
Place the turkey breast-side up on the rack, centering it in the pan. Tuck wing tips if your recipe directs you to do so. Put the oven rack in the lower third of the oven, then set the pan on the rack while it is pulled out enough to work safely. Slide the rack in slowly and confirm the pan is level before closing the door.
Tip: Use a rimmed tray under or beside the pan while carrying it. Do not fill the pan to the brim with broth or other liquid; hot drippings can spill.
Check: The pan is level, the turkey is centered, and the oven door closes without touching the pan or bird.
Step 6: Roast and monitor safely
Set the oven temperature and cooking method from your recipe. Avoid opening the door repeatedly, since heat loss can slow roasting. If you baste, work quickly and keep your face and hands away from rising steam. Check the turkey’s temperature in the thickest parts as the recipe’s expected finish time approaches, avoiding bone with the thermometer probe.
Follow current food-safety guidance for poultry temperature. Check the breast and the innermost thigh and wing areas; the readings must reach the safe temperature specified by your food-safety authority or recipe.
Tip: A pop-up timer is not a substitute for a food thermometer. If the skin browns too quickly, tent it loosely with foil as directed by the recipe.
Check: The thermometer readings meet the safe temperature guidance in the required locations, and the juices are contained in the pan.
Step 7: Rest the turkey and handle the pan
Put on dry oven mitts and pull the rack out steadily. Lift the pan with both hands, or have a helper support the other side, and place it on a heat-safe surface. Rest the turkey for the time your recipe specifies before carving. Pour or ladle drippings carefully into a heat-safe container for gravy, keeping hot fat away from water and skin.
Tip: Do not carry a heavy roasting pan by one handle. Let the pan cool before washing, and follow its care instructions to avoid warping or damaging a nonstick coating.
Check: The pan remains stable during removal, the turkey rests before carving, and the drippings are transferred without a spill.
Common Mistakes to Avoid
- Choosing a pan based only on turkey weight. — Measure both the bird and oven, and include handles and rack clearance in the fit check.
- Using a flimsy foil pan unsupported. — Set it on a rigid rimmed baking sheet or use a sturdy roasting pan to support the load.
- Filling the pan with too much liquid. — Follow the recipe’s amount; excess liquid can spill and create steam that affects browning.
- Judging doneness by color or cooking time alone. — Use a food thermometer in the recommended locations and follow safe-temperature guidance.
Troubleshooting
Problem: The pan does not slide into the oven easily.
Solution: Remove it before adding the turkey. Lower or reposition the rack, then test the empty pan again. Choose a smaller pan if it still catches or prevents the door from closing.
Problem: The pan rocks or the turkey is unstable.
Solution: Take the pan out and center it on a flat rack. Adjust or replace the roasting rack, or use a stable vegetable bed that supports the bird evenly.
Problem: The pan starts to overflow with drippings.
Solution: With oven mitts, carefully remove some liquid using a heat-safe baster or ladle into a heat-safe container. Keep the pan level and avoid splashing; resume roasting once it is stable.
Problem: The turkey browns before its interior reaches a safe temperature.
Solution: Tent the browned areas loosely with foil and continue roasting. Recheck the thickest sections with a thermometer, following the recipe and food-safety temperature guidance.
What Success Looks Like
Your roasting pan fits the oven with clearance, supports the turkey securely, and holds the drippings without overflowing. The turkey cooks evenly enough for the recipe and reaches the required safe temperature in the breast and innermost thigh and wing areas. After resting, the bird is ready to carve and the pan can be handled without spills.
Next Steps
Let the pan cool before cleaning. Soak stuck-on drippings with warm water if the manufacturer’s care directions allow it, then use a nonabrasive sponge to protect the finish. Dry the pan fully before storage. Record the pan dimensions and the turkey size it handled so you can choose quickly for the next holiday meal. Replace a pan with loose handles, severe warping, or a damaged cooking surface.
Frequently Asked Questions
What size roasting pan do I need for a Thanksgiving turkey?
Choose a pan that fits the turkey without crowding and fits your oven with the door closed and room for airflow. Turkey weight is only a rough guide, so measure the bird and oven before buying.
Do I need a rack in the roasting pan?
A rack helps lift the turkey above the drippings and allows heat to circulate. If you do not have one, a stable layer of vegetables can support the bird; follow your recipe for placement and cooking method.
Can I use a disposable foil roasting pan?
Use one only if it is sturdy enough for the turkey and juices, and support it with a rigid rimmed baking sheet or another pan. Thin foil pans can bend when lifted, causing burns or spills.
Can I use my roasting pan to make gravy on the stove?
Only if the manufacturer says the pan is safe for stovetop use and the pan fits the burner. Some pans are oven-only; transfer drippings to a saucepan when the label or manual is unclear.
How do I know the turkey is done?
Use a food thermometer and check the thickest breast area and innermost thigh and wing areas without touching bone. Follow current food-safety temperature guidance and the recipe; color and a pop-up timer alone do not confirm safety.