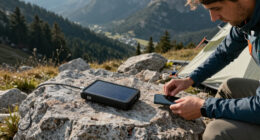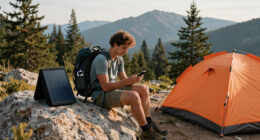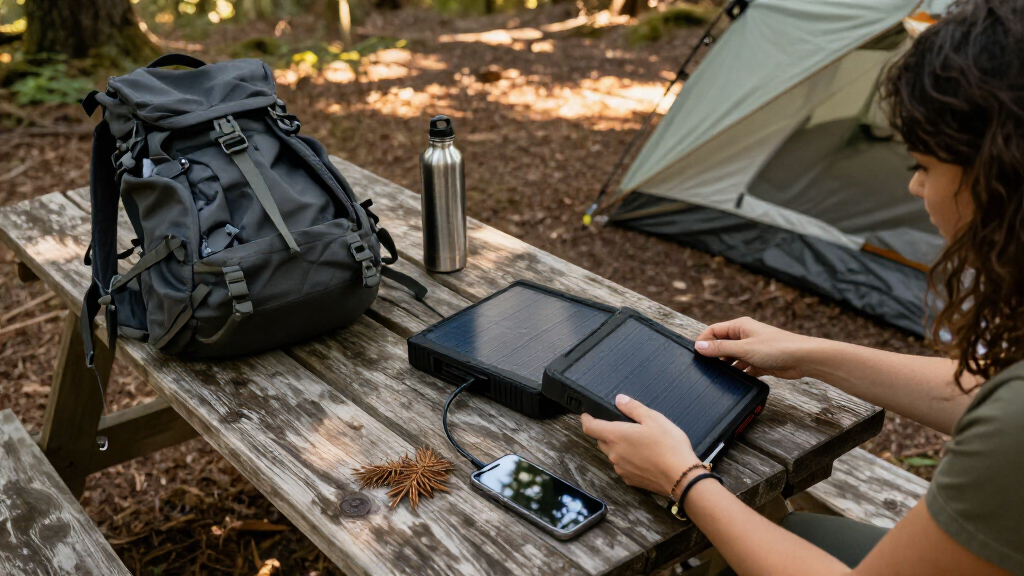

Use this guide to prepare a portable solar power bank, recharge it, and use it to charge a phone or another compatible device. It is for beginners who have a power bank with a built-in solar panel or a separate solar panel that connects to the bank. Allow about 30 minutes for setup and a first device charge; filling the bank from sunlight can take much longer and depends on the model and weather.

Get travel and outdoor gear delivered free with Prime
- Fast, free delivery on millions of items
- Prime Video, Amazon Music and more included
- Member-only deals all year

SolarTred 20,000mAh Solar Power Bank with Four Panels and Three Built-In Cables
- ✔ Battery capacity: 20,000mAh
- ✔ Solar panels: 4 integrated panels
- ✔ Built-in cables: USB-C output, Lightning output, USB-A input

BLAVOR 10,000mAh Solar Power Bank with Wireless Charging
- ✔ Battery capacity: 10,000mAh
- ✔ USB-C output: 20W
- ✔ Wireless charging: Qi compatible

BLAVOR 20,000mAh Solar Power Bank with Wireless Charging
- ✔ Battery capacity: 20,000mAh
- ✔ Maximum output: 20W
- ✔ Built-in cables: 4: 2 USB-C, 1 iOS, 1 USB-A
Difficulty: Beginner | Time: 30 minutes to set up; solar charging may take several hours or longer
What You’ll Need
Tools & Materials:
- Portable solar power bank and its instruction manual
- Charging cable compatible with the power bank
- USB cable for the device you plan to charge
- Wall charger for the power bank, if supported
- Separate compatible solar panel, if the bank does not have a built-in panel
Knowledge:
- Basic use of USB cables and charging ports
- How to read battery indicators on the power bank
Check the manual for the bank’s input rating, output ports, weather limits, and indicator meanings. A small built-in panel is usually intended to top up the bank or provide emergency charging; it may not recharge a depleted bank quickly. Use only panels and adapters that match the manufacturer’s specifications.
SolarTred 20,000mAh Solar Power Bank with Four Panels and Three Built-In Cables
The SolarTred M5WS is the most balanced choice in this group for buyers who want a high-capacity outdoor bank with charging options already attached. Its 20,000mAh battery matches the larger BLAVOR, while four integrated solar panels and three built-in cables reduce the need to pack separate leads. It can charge up to five devices simultaneously according to its description, a useful distinction for groups or trips involving a phone, headlamp, and other small electronics.Its clearest advantage over both BLAVOR models is IP67-rated protection, alongside a dual flashlight and separate camping light. That makes it the most explicitly ruggedized option here, although its 1.4-pound weight is substantial compared with the 9.3-ounce BLAVOR 10,000mAh. SolarTred’s lights also cannot operate at the same time, and four panels do not tell us how quickly the battery will recharge in real conditions. This pick makes most sense when capacity, cable convenience, and protection matter more than minimizing pack weight.
Pros:
- 20,000mAh capacity with four integrated solar panels
- Three built-in cables plus USB-A and USB-C ports
- IP67-rated water, dust, and shock resistance
- Includes a flashlight and adjustable camping light
Cons:
- At 1.4 pounds, it is much heavier than the 10,000mAh BLAVOR
- Solar recharge speed is not specified, and the two lights cannot run together
Best for: Campers and day-trip groups who want a high-capacity bank with built-in cables, multiple charging connections, and an IP67 rating.
Not ideal for: Ultralight travelers or anyone expecting solar panels alone to quickly replenish a depleted 20,000mAh battery.
Bottom line: We’d choose SolarTred for a rugged, high-capacity outdoor kit, provided its weight fits our plans.
“We’d choose SolarTred for a rugged, high-capacity outdoor kit, provided its weight fits our plans.”
BLAVOR 10,000mAh Solar Power Bank with Wireless Charging
For buyers who put carry weight ahead of reserve capacity, this BLAVOR 10,000mAh is the more compact alternative to the two 20,000mAh banks. At 9.3 ounces, it is the lightest model with a supplied weight, and it adds Qi wireless charging alongside 20W USB-C output. That mix is handy when we want to top up a compatible phone without searching for a cable, while retaining a wired fast-charge option.The smaller battery is the main compromise: it has half the stated capacity of the SolarTred and BLAVOR 20,000mAh. Its description says it can charge up to three devices at once, but its solar performance is not specified, so we should not choose it on the assumption that sunlight will make up the capacity gap quickly. The IPX5 rating and dual flashlights offer outdoor utility, while the compass carabiner is a simple accessory rather than a substitute for navigation gear. Compared with the SolarTred, this is easier to justify for a lighter day pack, but less suited to longer trips or several devices.
Pros:
- Lightest listed model at 9.3 ounces
- Qi wireless charging and 20W USB-C output
- Can charge up to three devices simultaneously
- Includes dual flashlights and compass carabiner
Cons:
- 10,000mAh capacity is half that of the larger picks
- Solar charging performance is not specified
Best for: Day hikers and everyday carry buyers who value a lighter bank, Qi charging, and 20W wired output over maximum capacity.
Not ideal for: Multi-day travelers, groups, or buyers who need the larger reserve and stronger stated protection rating of SolarTred.
Bottom line: We’d pick this BLAVOR when low carry weight and wireless convenience matter more than a large power reserve.
“We’d pick this BLAVOR when low carry weight and wireless convenience matter more than a large power reserve.”
BLAVOR 20,000mAh Solar Power Bank with Wireless Charging
This larger BLAVOR suits buyers who want 20,000mAh capacity with more ways to connect devices. Its four built-in cables cover USB-C, iOS, and USB-A connections, while a separate 20W USB-C port and Qi wireless charging broaden the options further. The product also lists wireless charging for compatible Apple Watch models, which makes it more flexible than the SolarTred for a mix of devices that support those charging methods.Compared with the SolarTred, this model brings a wider set of built-in cable types and wireless charging, but SolarTred has the stronger stated ingress rating: IP67 versus this BLAVOR’s IPX5. BLAVOR includes solar charging, yet no rate is given, and its dimensions are listed without a weight, making portability harder to judge against the 9.3-ounce compact BLAVOR. A flashlight, camping light, red indicator, compass, thermometer, carabiner, and rope add convenience, though buyers should decide whether they will use that accessory bundle. It is the best fit for device variety, not for those seeking the clearest evidence of rugged protection or the lightest pack.
Pros:
- 20,000mAh capacity with 20W USB-C output
- Four built-in cables plus Qi wireless charging
- Wireless charging support for compatible phones and Apple Watch
- Includes multiple lights, compass, thermometer, and carabiner
Cons:
- Solar charging speed is not specified
- Weight is not provided, and IPX5 is a lower stated rating than SolarTred’s IP67
Best for: Travelers carrying several device types who want high capacity, built-in cable variety, wireless charging, and outdoor accessories.
Not ideal for: Buyers prioritizing a verified low weight, a stated solar recharge rate, or the IP67 rating listed for SolarTred.
Bottom line: We’d choose this BLAVOR for broad charging compatibility, as long as its unspecified weight and solar rate are acceptable.
“We’d choose this BLAVOR for broad charging compatibility, as long as its unspecified weight and solar rate are acceptable.”
As an Amazon Associate we earn from qualifying purchases.
Before You Start
Inspect the bank, cables, and panel for cracks, swelling, exposed wires, or other damage. Do not use damaged equipment. Keep the bank dry unless its manual gives a specific water-resistance rating; water resistance does not mean it can be submerged. Avoid leaving it in a hot car or direct sun for long periods, since heat can damage the battery. If the bank is new, follow the manual’s first-charge instructions.
Before connecting a device, check that its charging cable fits and that the bank’s output is suitable. Solar charging varies with sunlight, panel angle, shade, temperature, and the panel’s size. Do not rely on a solar bank as your only power source for an emergency until you have tested it.
Step-by-Step Instructions
Step 1: Inspect the power bank and identify its ports
Read the labels beside the ports and check the manual to identify the charging input, device outputs, power button, and battery indicator. Inspect the casing and cables. If you have a separate panel, confirm that its connector and output match the bank’s solar input.
Tip: A USB output is for powering a device; it may not accept power to recharge the bank. Use the port marked input or solar input for recharging.
Check: You can identify which port recharges the bank and which port will charge your device, and the equipment has no visible damage.
Step 2: Charge the bank before relying on it
For the first recharge, use the manufacturer-approved wall charger and the input port if the manual recommends it. Connect the cable, then check that the indicator shows charging. Let the bank charge until its display or indicator signals full, and disconnect it. If you have no wall power, skip to solar charging, but allow substantially more time.
Tip: Do not leave charging equipment unattended if its manual advises against it. Disconnect the bank if it becomes unusually hot, smells odd, or shows damage.
Check: The indicator reports a full charge or the manual’s stated completion signal appears.
Step 3: Set up the solar panel in direct sunlight
If using a separate panel, unfold or place it in an open, sunny spot and connect it to the bank’s solar input as directed by the manual. If the bank has a built-in panel, place that panel facing the sun. Angle the panel toward the sun and keep it clear of shade from trees, buildings, bags, and cables. Secure it so wind cannot knock it over.
Tip: A window, cloud cover, or even a narrow shadow can reduce charging. Keep the bank itself within its stated temperature range; move it out of excessive heat while keeping the panel exposed to sun if the setup allows.
Check: The panel is connected to the correct input, faces unobstructed sunlight, and the bank indicates that solar charging has started.
Step 4: Check solar charging and reposition as needed
Check the battery indicator after several minutes to confirm that the bank is receiving power. Reposition the panel as the sun moves and clear any new shade. Leave it charging for the period stated in the manual, checking occasionally rather than expecting a quick full recharge. Disconnect the panel when charging is complete or when you bring the equipment indoors.
Tip: A built-in panel may add only a small amount of charge over a day. Use the manual’s expected charging time for your panel and conditions; do not assume that a lit indicator means the bank is nearly full.
Check: The indicator shows charging or a battery-level increase over time. The panel and bank remain undamaged and within their specified temperature limits.
Step 5: Connect a device to the correct output
Choose an output that matches your device and cable, then connect the device. Press the power button if the bank does not start charging automatically. Keep the cable firmly seated at both ends, and leave airflow around the bank while it operates.
Tip: If the bank has more than one output, check the manual before charging several devices at once; shared outputs can lower charging speed or exceed the bank’s limits.
Check: The device displays its charging symbol or otherwise confirms that it is receiving power from the bank.
Step 6: Monitor the charge and store the equipment
Check the bank and device periodically. Disconnect the device when it is charged or when the bank’s remaining capacity is low. Turn off the bank if it has a power control and is no longer in use. Store the bank and panel clean, dry, and out of direct heat; follow the manual’s storage-charge guidance.
Tip: Do not pull a cable by its wire. Hold the connector, and fold or pack the panel only as its instructions allow.
Check: The device has gained charge, the bank shows a lower battery level, and the equipment is disconnected and stored according to its instructions.
Common Mistakes to Avoid
- Expecting a small built-in panel to fully recharge an empty bank quickly. — Treat built-in solar as a slow top-up unless the manual gives a realistic full-charge estimate for your conditions. Charge from a wall outlet when available.
- Connecting a panel or cable to the wrong port. — Read the port labels and manual before connecting. Match a separate panel’s connector and output to the bank’s solar input.
- Leaving the bank in direct sun until it overheats. — Keep the panel in sunlight while protecting the bank from excessive heat when the design allows. Follow the stated operating temperature range.
- Assuming the bank can charge any device or multiple devices at full speed. — Check output ratings and the device’s cable requirements. Confirm the bank’s limits before connecting more than one device.
Troubleshooting
Problem: The bank does not show that solar charging has started.
Solution: Check that the panel is connected to the solar input, reseat the connector, and remove shade. Confirm the panel is compatible and producing power in the current sunlight. Consult the manual for the indicator pattern.
Problem: Solar charging is very slow.
Solution: Move the panel into unobstructed direct sun and angle it toward the sun. Check for cloud, window glass, dirt, or shadows. Allow for the panel’s stated charging time; use a wall charger when available.
Problem: The connected device does not charge.
Solution: Check the device cable and output port, press the bank’s power button, and confirm that the bank has charge remaining. Try a compatible cable or another supported output, then check the manual for device compatibility.
Problem: The bank or panel becomes unusually hot, smells unusual, or appears swollen.
Solution: Disconnect the equipment from the panel and device if it is safe to do so. Move it away from flammable materials without handling a swollen or damaged battery, and stop using it. Contact the manufacturer or an appropriate battery disposal service for instructions.
What Success Looks Like
The bank’s indicator shows that it has stored charge, and a compatible device displays that it is charging when connected to the correct output. The bank’s battery level falls as it supplies power. The panel, bank, and cables remain in good condition, and the equipment is disconnected and stored within the manufacturer’s guidance.
Next Steps
Before taking the bank on a trip, fully charge it from a wall outlet when possible and test it with the device and cable you plan to carry. Check the stored charge before each trip and recharge it according to the manual. Clean the panel with the method its manufacturer recommends, and replace damaged cables or equipment rather than relying on them outdoors. For critical equipment, carry a tested backup power source and follow that equipment’s own power requirements.
Frequently Asked Questions
How long does it take to charge a solar power bank in sunlight?
It depends on panel size, battery capacity, sunlight, shade, temperature, and the bank’s charging controls. Check the manual for a charging estimate. A compact built-in panel may need many hours of strong sun and may only provide a top-up.
Can I charge a phone while the power bank is charging from the sun?
Only do this if the manual supports simultaneous charging and output. Some banks limit or stop charging when powering another device, and simultaneous use can increase heat or lengthen charging time.
Can I leave the power bank outside in rain?
Only if its specified water-resistance rating and the manual permit those conditions. Keep connectors dry unless they are rated for exposure, and never submerge the bank or panel.
Why does the battery indicator change slowly or appear inconsistent?
Many indicators show broad charge ranges rather than precise measurements. Solar input also changes with sunlight. Compare the reading over time in steady conditions and consult the manual for the meaning of each light or display level.