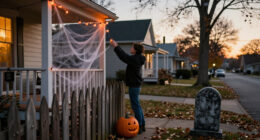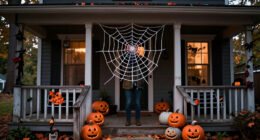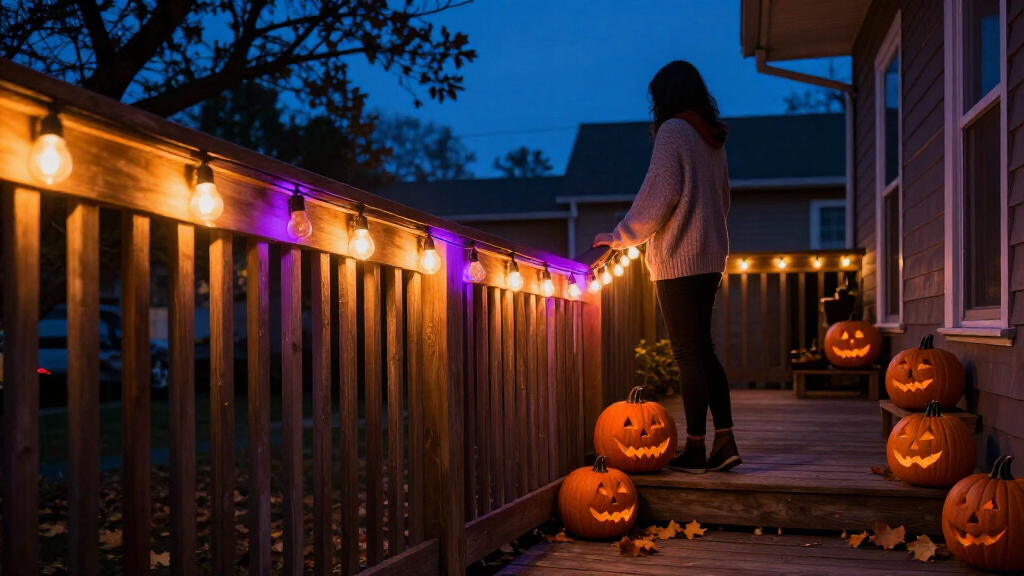
This guide walks you through hanging Halloween outdoor string lights around your porch, eaves, trees, or fence so they stay secure, look intentional, and survive wind and rain. You will plan the layout, choose the right lights and hardware, hang them safely at working height, connect power without overloading circuits, and confirm the whole display works before Halloween night. The guide is written for beginners — no electrical or ladder expertise is required, though basic comfort with a ladder and an outdoor outlet is assumed. Expect the job to take one to three hours depending on how large an area you are decorating.

Get travel and outdoor gear delivered free with Prime
- Fast, free delivery on millions of items
- Prime Video, Amazon Music and more included
- Member-only deals all year

Joomer Orange Purple Halloween String Lights, 100FT 300LED Plug-in
- ✔ Length: 100 ft
- ✔ LED Count: 300
- ✔ Color: Orange and Purple

Huyamap 20FT 40-LED Halloween String Lights – Pumpkin, Bat, Spider & Ghost Shapes, Battery Operated, 8 Modes, Waterproof
- ✔ Length: 20 ft
- ✔ LED Count: 40
- ✔ Light Colors: Orange, Purple, Green, White

DAZZLE BRIGHT Halloween 300 LED String Lights, 100FT with 8 Modes, Purple & Orange
- ✔ Length: 100 ft
- ✔ LED Count: 300
- ✔ Color: Purple & Orange
Difficulty: Beginner | Time: 1-3 hours
What You’ll Need
Tools & Materials:
- Outdoor-rated string lights (UL or ETL listed for wet locations)
- Outdoor-rated extension cord or heavy-duty power strip with weatherproof cover
- Ladder (step ladder for porches; extension ladder for eaves)
- Cup hooks, screw-in hooks, zip ties, or light clips rated for outdoor use
- Drill with a small bit, or a screwdriver for hooks
- Timer or smart plug (optional but recommended)
- GFCI outlet tester or access to a GFCI-protected outlet
Knowledge:
- Ability to safely use a ladder
- Basic understanding that outdoor electrical connections must be weatherproofed
- Rough measurement of the area you want to decorate
Measure your decorating area before buying lights — total linear footage plus about 10 percent slack. Check that every light string and extension cord is explicitly rated for outdoor or wet-location use; indoor-only lights used outside are a fire and shock hazard. Confirm you have an outdoor GFCI outlet near the display area; if not, plan a safe cord route or consult an electrician.
Joomer Orange Purple Halloween String Lights, 100FT 300LED Plug-in
The Joomer 100-foot set takes our top spot because it solves the two problems that ruin most Halloween displays: daily maintenance and insufficient coverage. The 6-hour timer with memory function means you set your preferred mode once, and the lights repeat it every evening without touching a switch — a daily convenience neither manual option can match. With 300 LEDs across 100 feet, it delivers dense, even color that reads clearly from the street, which is the whole point of outdoor decorating.Compared with the DAZZLE BRIGHT set, which matches its LED count and length, Joomer pulls ahead on usability rather than raw output: the timer and mode memory give it set-and-forget behavior that DAZZLE BRIGHT lacks entirely. The tradeoff is expandability — Joomer connects only 2 sets end-to-end versus DAZZLE BRIGHT’s 3, so if you’re wrapping an entire house or large yard, the ordering of these two picks flips. Like all IP44 sets, its adapter must stay dry and elevated, so budget for a covered outlet or a protective box.
Pros:
- 6-hour timer plus memory function automates your display every evening
- 100 feet with 300 LEDs covers large porch and fence spans in one set
- 8 lighting modes give options from steady glow to spooky flicker
- End-to-end connectable for expanding coverage
Cons:
- Adapter must be kept dry and away from water despite the IP44 rating
- Connects only 2 sets, half the expandability of the DAZLE BRIGHT
Best for: Homeowners decorating a porch, railing, or fence line who want a long, bright, automated display.
Not ideal for: Whole-house displays needing more than 200 connected feet, or setups far from a protected outlet.
Bottom line: The most complete package for typical home Halloween displays — long, bright, and fully automated once you set it up.
“The most complete package for typical home Halloween displays — long, bright, and fully automated once you set it up.”
Huyamap 20FT 40-LED Halloween String Lights – Pumpkin, Bat, Spider & Ghost Shapes, Battery Operated, 8 Modes, Waterproof
Where the two 100-foot sets assume you have an outlet, the Huyamap shaped-light set assumes you don’t — and that changes everything about where it can go. Running on 3 AA batteries, it wraps trees, mailbox posts, window frames, and party backdrops with zero cords, and the included remote with a 6-hour timer preserves the automation we praised on the Joomer. The shaped LEDs — pumpkins, ghosts, bats, and spiders — are the other half of the appeal: unlike the plain orange and purple bulbs on our other picks, these stay decorative even in daylight, so your display works around the clock rather than only after dark.Its IP65 rating is the best in this lineup, a meaningful step above the IP44 splash protection on both plug-in sets, and worth prioritizing if your October weather turns wet. The obvious cost is scale: 20 feet and 40 LEDs is accent lighting, not house lighting. Judged against the Joomer’s 100 feet, it covers a fraction of the area, and battery replacements become an ongoing expense on a daily timer. Note that batteries ship separately, so it isn’t ready to hang out of the box.
Pros:
- Fully cordless operation decorates anywhere without an outlet
- IP65 waterproof rating is the strongest weather protection in this lineup
- Shaped pumpkin, ghost, bat, and spider LEDs look great even unlit
- Remote control with 6-hour timer for hands-off daily operation
Cons:
- Batteries (3 AA) not included, adding cost before first use
- 20-foot length is too short for large displays or long fence lines
Best for: Renters, window and mantel decorators, and anyone adding accents to spots with no outdoor outlet.
Not ideal for: Large fences, rooflines, or yards where 20 feet disappears and plug-in power is available.
Bottom line: The pick for placement freedom and rainy climates — just accept that it accents rather than dominates.
“The pick for placement freedom and rainy climates — just accept that it accents rather than dominates.”
DAZZLE BRIGHT Halloween 300 LED String Lights, 100FT with 8 Modes, Purple & Orange
The DAZZLE BRIGHT 300-LED set matches the Joomer on paper — same length, same LED count, same 8 modes, same IP44 rating — but its differences are exactly where big-display builders should pay attention. It connects up to 3 strings end-to-end, versus Joomer’s 2, stretching a single outlet’s coverage to 300 feet. That makes it the practical choice for rooflines, full-fence wraps, and party venues where the Joomer tops out too early.Its second distinction is safety: the UL-certified 29V low-voltage design makes it the more reassuring option around children, pets, and high-traffic walkways, something neither competitor emphasizes. The tradeoffs mirror the Joomer’s, plus one more: there’s no timer or memory function, so the lights run until you switch them off — pair them with a smart plug to close that gap. Its 29V system also effectively tethers you closer to the outlet than a standard-voltage string, so plan your layout around the adapter location rather than stretching it to its limit.
Pros:
- Connects up to 3 strings for up to 300 feet of coverage from one outlet
- UL-certified 29V low-voltage design is safer around kids and pets
- 300 LEDs deliver bright, street-visible color across the full 100 feet
- 8 lighting modes for varied spooky effects
Cons:
- No timer or memory function, so lights run until manually switched off
- IP44 splash-proofing is not suited to heavy rain or standing water
- Low-voltage adapter limits usable distance from the outlet
Best for: Homeowners and event decorators covering large areas who want maximum expandability and certified low-voltage safety.
Not ideal for: Anyone wanting automated daily operation without adding a smart plug, or setups far from an outlet.
Bottom line: The safest and most expandable 100-foot option — best for big displays, as long as you handle the on/off switching yourself.
“The safest and most expandable 100-foot option — best for big displays, as long as you handle the on/off switching yourself.”
As an Amazon Associate we earn from qualifying purchases.
Before You Start
Do the planning on the ground, not on the ladder. Decide where the lights will start (nearest the power source) and end, and sketch the path. Walk the route and look for anchor points: eaves, railings, fence posts, tree branches. Check the weather forecast — hanging lights in wind or rain is dangerous and makes everything harder. If you will be climbing above the first rung of an extension ladder, have a second person hold the ladder. Inspect every string for cracked sockets and frayed wires before it goes up; damaged strings should be replaced, not taped.
Step-by-Step Instructions
Step 1: Test the Lights Before Hanging Anything
Plug in each string of lights indoors or at the outlet while it is still on the ground. Inspect every bulb and socket — look for dark bulbs, cracked sockets, or loose fittings. Replace any dead bulbs now — replacing them after the string is hanging overhead is far more difficult.
Tip:If you are using replaceable-bulb strings, buy a small pack of spare bulbs before you start. Storing a few spares in the timer box saves a mid-season trip up the ladder.
Check: Every string lights fully, with no dark bulbs and no visible wire damage.
Step 2: Map the Route and Set Anchor Points
Walk the path the lights will follow, starting at the outdoor outlet, and mark each anchor point — typically every 4 to 6 feet along eaves, railings, or fence lines. Choose a fastener for each point: a cup hook for wood surfaces, a clip for gutters and railings, or a zip tie for trees and posts. Write the plan down so you can work from it on the ladder without guessing.
Tip:Never nail or staple light strings to the house. Fasteners pierce the insulation and create shock and fire hazards. Use hooks or clips that hold the wire without piercing it.
Check: You have a written anchor plan with a chosen fastener type for each point, and the route starts and ends where you planned.
Step 3: Install the Fasteners
Install your hooks or clips working along the route. For cup hooks in wood, drill a small pilot hole slightly smaller than the hook threads, then screw the hook in by hand until only the curve shows. For gutter and railing clips, snap them onto the lip of the gutter or rail. For trees and posts, wrap zip ties loosely around the branch or post — you will tighten them when the lights go up.
Tip:Pilot holes prevent the wood from splitting and make screwing hooks in much easier. Skip the pilot hole only in very soft trim wood.
Check: All hooks and clips are installed and feel firm when tugged lightly. Nothing wobbles or pulls out under slight pressure.
Step 4: Hang the Strings Along the Route
Carry the first string up the ladder, starting at the end nearest the outlet. Set the wire into each hook or clip as you go, leaving a gentle sag between anchor points — a slight swag looks intentional and relieves tension on the wire. At trees, loop a zip tie around the branch and the wire, then snug it without crushing the wire insulation.
Tip:Never pull string lights taut like a straight line. Tension stresses the wire, pulls hooks loose in wind, and makes the display look harsh. A soft curve between anchors is the goal.
Check: The string follows your planned route with even, gentle swags, and the plug end reaches the outlet with slack to spare.
Step 5: Connect Multiple Strings Within Safe Limits
Read each string’s packaging for the maximum number of connectable strings before joining them end to end — usually 3 to 5 for incandescent, and often far higher for LED. Join only as many strings as the limit allows. Route the connection points so plug connections sit in a covered area or inside a weatherproof connection box, off the ground and away from where water collects.
Tip:LED strings draw a fraction of the power of incandescent ones and let you connect far more strings safely. If you have a large display, LEDs are the practical choice.
Check: No more strings are connected in a single run than the packaging allows, and all plug connections are protected from rain.
Step 6: Run Power Safely From the Outlet
Plug the display into an outdoor-rated extension cord or power strip connected to a GFCI-protected outdoor outlet. Keep cords off walkways and doors where they can be tripped over or pinched. Where a cord crosses a path, secure it flat with outdoor-rated cord covers. Position plug connections above ground level or inside a weatherproof box designed for outdoor cords.
Tip:Press the test and reset buttons on the GFCI outlet before plugging in. If the outlet does not trip and reset, have it inspected before using it for the display.
Check: The full display lights up, the GFCI tests correctly, and no cord crosses a walking surface without protection.
Step 7: Set a Timer and Verify the Finished Display
Program an outdoor timer or smart plug with your preferred schedule — for example, dusk to 11 p.m. — and plug the lights into it. Wait for dark, then walk out to the street and view the display the way neighbors and trick-or-treaters will see it. Look for dark sections, uneven sagging, or strings that disappear behind fixtures, and adjust those spots.
Tip:Viewing from the street is the step most people skip. Lights that look even up close often have gaps or bright clumps when seen from a distance.
Check: From the sidewalk at night, the display looks even and complete, the timer switches the lights on and off as scheduled, and no dark sections remain.
Common Mistakes to Avoid
- Using indoor-rated lights or extension cords outside — Check every product label for ‘suitable for wet locations’ or an outdoor rating before it leaves the house. Indoor cords exposed to rain can short, shock, or start a fire.
- Stapling or nailing light strings to the house — Use screw-in hooks, gutter clips, or zip ties only. Metal fasteners that pierce wire insulation are one of the most common causes of holiday light fires and shocks.
- Connecting too many strings end to end — Read the packaging for the maximum connectable string count and count your run before plugging in. When in doubt, run a second extension cord feed from the outlet rather than chaining more strings.
- Hanging lights on a windy or wet day from an extension ladder alone — Check the forecast, pick a calm dry day, and always have someone steady the ladder when you are working above shoulder height.
Troubleshooting
Problem: Part of a string goes dark after installation
Solution:
Check the bulbs in the dark section first — one loose bulb can kill a run of lights on some string types. If the bulbs are fine, inspect the wire along that section for damage from a zip tie pulled too tight or a clip pinching the insulation. Re-seat the fuse in the plug if the whole string is out; replacement fuses ship inside most plug heads.
Problem: The GFCI outlet trips as soon as the lights are plugged in
Solution:
Unplug everything, reset the outlet, and plug the lights in one string at a time to isolate the faulty string. A string that trips the GFCI has water in a connection or damaged insulation — remove it from the display and replace it. Do not bypass or defeat the GFCI.
Problem: A plug connection is exposed to rain with no way to relocate it
Solution:
Use an inexpensive weatherproof cord connection box — a sealed plastic case that encloses the joined plugs — available at any hardware store. As a short-term measure, orient the connection so the plugs face downward with the upper cord looping below the connection, which keeps rain from running into the sockets.
Problem: Wind keeps pulling hooks loose or swaying the strings into the house
Solution:
Reduce the span between anchor points to 4 feet or less, add a second zip tie at tree anchor points, and increase the swag slightly so wind can flex the wire instead of yanking the hooks. Take the display down before any forecast storm with high winds.
What Success Looks Like
Your display is complete when all of the following are true: the lights run in even swags along the planned route with no dark sections; every fastener holds firm under a light tug; all cords and connections are outdoor-rated and protected from rain; the display is on a GFCI-protected circuit that tests correctly; the timer switches the lights on at dusk and off on schedule; and the display looks even and intentional when viewed from the street at night. Once those checks pass, no further work is needed until the season ends.
Next Steps
Check the display once a week through October — replace burned-out bulbs after each check and re-tighten any hooks or zip ties loosened by wind. Take the display down promptly after the season, ideally on a dry day, before freezing temperatures make cords stiff and brittle. Coil each string loosely, secure it with a zip tie, label the route on the coil with tape, and store everything in a sealed bin indoors so setup next year takes half the time. If you want to expand the display, add pathway markers or projector lights on the same timer so everything switches together.
Frequently Asked Questions
How many string lights can I safely connect together?
Follow the packaging, which states the maximum number of connectable strings — typically 3 to 5 for incandescent strings and often 20 or more for LED. If your run exceeds the limit, feed the excess strings from a separate extension cord connected directly to the outlet.
Can I hang string lights from my gutters without drilling?
Yes. Plastic gutter clips snap over the front lip of standard gutters and hold the wire securely with no screws or holes. They are inexpensive, install in seconds, and come off cleanly after the season.
Is it safe to leave Halloween lights on overnight?
LED lights on a timer set to switch off around bedtime are the safest setup. If you prefer to leave lights on overnight, use only LED strings — they run cool and draw very little power — and keep them on a GFCI-protected circuit. Avoid leaving incandescent strings running unattended for long periods.
Do I need a special extension cord for outdoor use?
Yes. Use a cord labeled for outdoor use, which has thicker insulation and molded plugs that resist water. Plug it into a GFCI outlet, keep connections off the ground and out of standing water, and protect any exposed plug junction with a weatherproof connection box.
How do I hang lights in trees without damaging them?
Use loose zip ties around branches rather than nails or screws, which wound the tree and can introduce disease. Snug the tie just enough to hold the wire, leaving room for the branch to move and grow. Cut and remove all ties at the end of the season rather than leaving them in place.
Halloween Picks
halloween
As an affiliate, we earn on qualifying purchases.