TL;DR
Portable outdoor camping cookware includes pots, pans, cups, kettles, and utensils made for preparing food away from a full kitchen. Choose pieces around your stove, group size, menu, and available pack space: aluminum is light and heats quickly, stainless steel is durable but heavier, and titanium saves weight at a higher price. A few well-chosen pieces can work better than a bulky set, especially when they nest and have stable handles and lids.
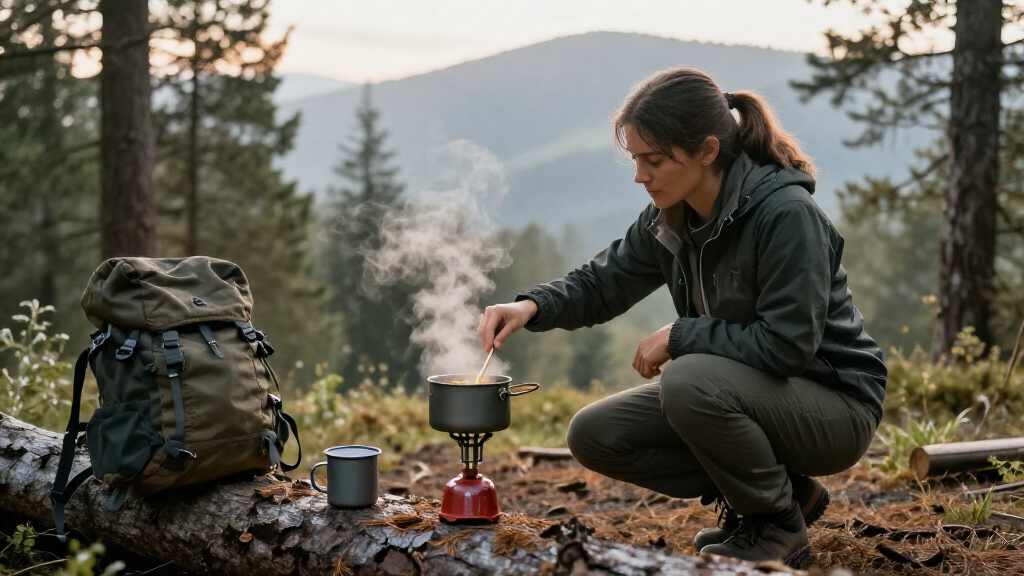
Your first camp dinner can go from comforting to chaotic when a tiny pot boils over, the handle slips, and the stove wobbles on a patch of dirt. The right portable outdoor camping cookware makes that same meal feel easy: steam curls from a stable pot, dinner cooks evenly, and cleanup takes less water than rinsing a plate at home.

Get travel and outdoor gear delivered free with Prime
- Fast, free delivery on millions of items
- Prime Video, Amazon Music and more included
- Member-only deals all year
Camping cookware includes pots, pans, kettles, cups, and utensils designed for cooking away from a full kitchen. The best setup depends on how you travel, what you eat, and how much weight and space you can spare. A solo hiker making oatmeal has different needs from a family frying breakfast beside the car.
This guide helps you match material, capacity, stove compatibility, and packing features to the trips you take. You’ll get practical ways to avoid buying pieces you won’t use, choose safer handles and stable shapes, and clean up when your water supply is limited.
Choose cookware based on your actual meals, group size, stove, and available pack space.
Aluminum heats quickly and weighs little; stainless steel is durable but heavier; titanium saves weight but often costs more and may heat unevenly.
Check the stove and pot for a stable fit, then follow the maker’s guidance for stoves, fires, and coatings.
Use nesting pieces and lids that serve more than one purpose to cut packed bulk.
Scrape and wipe food promptly, follow coating care instructions, and dispose of dishwater according to campsite rules.
Choose cookware around your trip, not the biggest set
Portable outdoor camping cookware works best when you choose pieces around your trip’s meals, group size, and pack space. A complete set can be convenient, but every spare pan and cup adds bulk; a few pieces you’ll use every day often do more for you. Think of a cookware kit as a small toolbox: the useful tools depend on the job. The difference matters most when you carry your gear: an unused pan takes up room that could go to food or warm clothing. At a car campsite, that same weight may barely matter, while having enough cooking surface can make dinner faster.
For example, if you’re hiking alone and boiling water for oats, soup, and a dehydrated dinner, a pot with a lid, a spoon, and a mug may cover the whole menu. If you’re driving to a lakeside campsite with two friends, a broad pot and a pan can make scrambled eggs and pasta easier. Your cookware includes pots and other items only if your meals call for them. This menu-first approach also helps you spot hidden constraints: a meal that needs frequent stirring calls for a pot with room to move food, while a boil-and-pour dinner can work in a smaller, lighter vessel.
Before shopping, write down a day of meals and note whether you’ll boil, simmer, fry, or share food. That simple exercise reveals the actual capacity and shapes you need. If your menu is mostly one-pot meals, a lid that doubles as a small pan may replace a separate skillet. If you love pancakes, a dedicated pan may earn its space. The tradeoff is that a multipurpose lid saves packing volume but may be too small or shallow for comfortable frying; a dedicated pan cooks better but adds weight and another item to clean.
- Backpacking: favor compact pieces that nest together. Smaller kits reduce carried weight, though limited cooking surface may mean making meals in batches.
- Car camping: prioritize comfortable handles and room to cook. The extra size is easier to justify when you don’t carry it far.
- Group trips: check pot capacity and whether the burner supports a filled pot. A shared pot can save fuel and gear, but a heavy, full vessel is harder to lift and may be less stable on a small stove.
Imagine packing at home and finding three matching cups but no spoon that fits inside the pot. Planning your meals first helps you avoid that kind of frustrating mismatch and spend your budget on pieces you’ll reach for. It also lets you compare complete packed kits rather than judging each item alone: a pot that nests a cup and utensils may take less space than several individually compact pieces.
Products Worth Considering

DJI Mini 3 Drone with DJI RC Controller

Briggs & Riley ZDX 30-Inch Expandable Hardside Checked Luggage, Black

DJI Mini 4K Fly More Combo Drone with 4K Camera and 3 Batteries
As an affiliate, we earn on qualifying purchases.
Compare materials by weight, cooking style, and care
Aluminum, stainless steel, and titanium each trade weight, durability, heat behavior, and price differently. Those tradeoffs affect more than how heavy a pot feels: they influence how evenly food cooks, how much attention it needs over a flame, and how it holds up in a packed kit. Aluminum is light and heats quickly; stainless steel is tough but heavier and can develop hot spots; titanium is extremely light and corrosion-resistant but often costs more and may heat unevenly. There’s no single best metal for every camper.
On a long hike, titanium can feel worth the price because every ounce rides on your shoulders. Its low weight is especially useful when the pot’s main job is boiling water, since there’s little stirring or prolonged cooking to expose uneven heating. But if you fry eggs over a compact stove, a thin titanium base can create hot areas that brown food before the rest cooks; careful heat control helps, but takes attention. A car camper cooking tomato sauce in a sturdy pot may prefer stainless steel: it tolerates regular use, though the added weight matters less when it travels in a trunk. Hard-anodized aluminum offers a tougher surface than basic aluminum while keeping weight relatively low, but coated surfaces need care according to the maker’s instructions. In practice, match heat behavior to the cooking you repeat: quick heating can save time and fuel, while more even heating can reduce the need to stir or watch the pot constantly.
| Material | What you gain | What to plan for |
|---|---|---|
| Aluminum | Low weight and quick heating | May dent; check whether it has a coating |
| Hard-anodized aluminum | Light build with a tougher surface | Follow the maker’s care guidance |
| Stainless steel | Durability and straightforward care | More weight and possible hot spots |
| Titanium | Very low weight and corrosion resistance | Higher cost and uneven heating in some designs |
| Cast iron | Strong heat retention | Generally too heavy for backpacking |
A thin titanium pot is a bit like a lightweight racing bike: it shines when weight matters, but you may want a gentler touch. Consider how you cook, the miles you carry it, and the care you’re willing to give it before choosing. A material advantage only pays off when it matches your habits: saving weight has less value if the pot makes everyday meals harder to cook. Compare the actual pot’s base, thickness, and finish as well as its material name, since two designs made from the same metal can behave differently on a stove.
Match pot size and shape to your stove and meals
Pot capacity and shape should match both your meal portions and the burner beneath them. A wider pot gives several people room to stir a shared meal, while a narrower pot may work efficiently with some compact stoves. The right size depends on how many campers you feed and whether you cook one meal at a time or build a multi-course dinner. Capacity also affects fuel and handling: extra empty space means more weight to carry and more water or food to heat, while a pot filled close to the rim leaves little room for stirring and can boil over more easily. Choosing too small a pot can force repeated batches, which uses time and may consume more fuel as the stove reheats; choosing too large a pot can waste fuel heating unused space.
For a solo breakfast of oatmeal, a small pot may keep water use and packed bulk down. For two campers boiling pasta, a pot with more room helps keep water from bubbling over when you stir. For a group of four, check both the pot’s stated capacity and your stove’s ability to support its weight when full; a big pot on a small burner can become an outdoor balancing act. If your group usually eats together, a shared pot can save fuel and gear, but cooking in batches may be easier when the burner is small or the menu needs different temperatures. Capacity labels describe volume, not necessarily comfortable cooking volume: leave space for bubbling and stirring rather than planning to fill the pot to its rim.
Shape matters just as much. A tall, narrow pot can pack neatly, but it may sit high on a narrow burner. A broad pot can feel more stable on a compatible stove, although the flame needs to spread appropriately for the base. A base wider than the burner may catch more heat, but it can also expose handles to flame or create uneven heating depending on the stove design. Before buying, compare the pot’s base and total filled weight with the stove maker’s guidance. Think of the stove and pot as a team: one must hold the other securely. A pot that technically fits but leaves little room for the stove supports can shift when you stir, so consider the contact points and the way you’ll handle it while cooking.
Try a realistic test at home: add the amount of water you’d use for a meal, set the pot on your stove, and check that the handles stay clear and the lid sits properly. This won’t replace the product instructions, but it can show whether your intended setup feels manageable. Stability matters outdoors, where uneven ground and wind can turn a small wobble into a spill. The test also helps you notice whether you can lift and pour the filled pot comfortably—an important detail when you don’t have a counter to set it on. If the setup feels awkward at home, carrying a full pot over uneven ground or in gusty conditions can make that weakness more consequential.
Check handles, lids, coatings, and fire guidance before cooking
Secure handles, a well-fitting lid, and clear heat-source guidance make camping cookware safer and easier to use. Folding or removable handles save space, but they must lock or grip firmly when you lift a hot, full pot. A lid keeps heat in and can shorten cooking time; a stable pot and burner help prevent spills. These features matter together: a lid that traps heat is useful, but it also means you need a secure grip when lifting the pot and releasing steam. A handle that feels solid with an empty pot may flex under a meal’s weight, so consider how it behaves under the load you expect to carry.
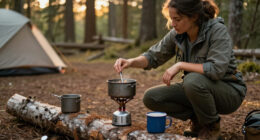
Picture making soup on a breezy evening: a loose lid rattles, steam escapes, and dinner takes longer while your fuel dwindles. A snug lid helps retain heat, and a heat-resistant handle or proper pot gripper gives you a safer way to move the pot. Keep your fingers away from hot metal, and set hot cookware on a steady, heat-safe surface. A removable gripper should be attached as directed and checked before lifting; if it shifts under load, set the pot down and let it cool before adjusting it. A lid can also reduce splashing while stirring, but lifting it releases steam and heat, so angle it away from your face and hands.
Check whether the maker approves your cookware for a canister stove, liquid-fuel stove, or open fire. Fire heat can be hotter and less controlled than a stove flame, and soot can leave a black film that takes extra scrubbing. Coated cookware may have specific limits, so follow the manufacturer’s instructions rather than guessing. Don’t overheat an empty nonstick pot or pan; high heat can damage its surface. Using a coating outside its heat guidance can shorten its life and make food stick, so the cookware’s intended heat source should shape where and how you use it. The same pot may behave differently across heat sources: a controlled burner lets you adjust output, while an open fire can expose the base to concentrated or uneven heat.
“Lightweight” is only useful when the pot still sits securely, the handle holds, and the material suits your heat source.
If you’re cooking with children nearby, keep the stove and hot cookware out of reach, supervise them closely, and create a clear cooking zone. At a family camp, putting the stove on a stable table away from play can prevent a curious hand from reaching a hot handle. A clear zone also gives the cook room to lift and set down hot pots without someone crossing close to the burner. Keeping that space consistent makes it easier for everyone to recognize where hot equipment is, even when attention shifts during a meal.
Pack fewer pieces and clean up with less water
Nesting cookware and a little meal planning can reduce both packed volume and cleanup. Pots that stack, cups that fit inside, and lids that double as pans turn a pile of separate gear into one compact bundle. Smooth surfaces are easier to wipe, while nonstick coatings can release food with less scrubbing but need gentler handling. A multi-use lid saves space only if it works for the meals you make; otherwise, the extra function adds little value and a dedicated pan may cook more comfortably. Packing fewer pieces also means fewer surfaces to wash and fewer small parts to lose, though a single pot doing several jobs may need cleaning between courses.
For a real example, tuck a small cup and spoon inside a lidded pot, then wrap the bundle in a cloth to stop it rattling in your pack. On a car-camping trip, you might bring a larger pan but leave home the extra cups if reusable mugs already cover everyone. Choosing what to pack is about what you’ll use, not filling every empty pocket. Securing loose pieces also keeps them from rubbing against a coating or making noise on the trail. The cloth can serve two purposes as padding and a wipe, provided it stays clean enough for food-contact use.
After a one-pot dinner, scrape leftovers into your food waste container, then wipe the pot with a small amount of water and a cloth or sponge. Removing food before washing means less residue to scrub and less dishwater to manage. A short soak with warm water can loosen stuck food; avoid abrasive tools on a coating unless the maker says they’re safe. Follow local rules for dishwater disposal, especially near lakes and streams, and use only cleaning products allowed at your campsite. Cleaning while residue is still soft is usually easier than letting it dry, which can require more water and harsher scrubbing. If water is especially limited, wipe thoroughly first and use only enough to finish the wash.
- Plan the menu: identify whether you need to boil, fry, or simmer.
- Choose the core pieces: pack the pot, lid, and utensils your meals require.
- Nest and secure: fit smaller items inside and stop loose parts from rattling.
- Clean promptly: scrape, wipe, and wash according to the cookware’s care instructions.
These habits help cookware last longer, especially if you check folding joints and pot grippers for damage before each trip. A loose joint or worn grip may seem minor while packing but can make handling hot food less reliable. Replace worn parts when the manufacturer offers them; a new gripper can keep a sound pot in service. A quick inspection also gives you a chance to confirm that nested pieces still fit and won’t rub away a coating during the next hike.
Frequently Asked Questions
What cookware is best for backpacking?
For backpacking, look for a compact, lightweight pot that fits your stove and holds enough for your meals. A solo camper who mainly boils water may only need a pot, lid, cup, and spoon. Choose based on your menu and trip length, since a full set can add weight without adding useful options.
Is titanium better than aluminum for camping?
Titanium is lighter and corrosion-resistant, while aluminum costs less in many cases and heats quickly. Titanium may heat unevenly and usually costs more, so it doesn’t suit every style of cooking. If you mainly boil water and count every ounce, titanium can make sense; for everyday pot cooking, compare the actual designs and stove fit.
Can I use camping cookware over an open fire?
Only use cookware over an open fire if the manufacturer says it is suitable for that heat source. Fire heat is less controlled than a stove flame and can produce soot, especially on the pot’s underside. Follow the maker’s instructions and expect more cleanup afterward.
Do I need a full camping cookware set?
No. A few carefully chosen pieces can cover your meals with less weight and bulk. If you mostly make one-pot food, start with a pot and lid, then add a cup or pan only if your menu calls for it. Nesting pieces can make a larger setup easier to pack.
How do I clean camping cookware with limited water?
Scrape leftover food into the appropriate waste container, then wipe the pot before washing so you use less water. A small amount of warm water can loosen stuck food; follow the cookware’s coating care instructions and campsite rules for dishwater disposal. Avoid dumping soapy water near lakes and streams.
How do I know if my pot will work with my camping stove?
Check the stove and cookware makers’ guidance for compatible heat sources, pot size, and supported weight. Set the pot on the burner at home to see whether it sits securely, then consider how stable the setup will be on your campsite’s surface. A tall or heavy pot on a narrow burner can be prone to tipping.
Conclusion
Choose cookware that makes your planned meals easy to cook and safe to serve. For a solo hike, that may mean one compact pot and a cup; for a family beside the car, it may mean a wider pot, stable handles, and enough room to stir. Let your menu and stove guide the purchase.
Pack the pieces you’ll use, check that the setup sits securely, and your next camp dinner can end with a warm bowl in your hands instead of a pot wobbling over the flame.